Featured Image
UX Design

Rapid Prototyping: Structure-based types.

Decide an approach of the prototype- on the basis of what you want to achieve, and decide a tool accordingly.

To continue with the thoughts on Rapid Prototyping in the earlier articles,
Rapid Prototyping: Deliver an experience, not a document and
Goal-based types of the prototype,
here are some further thoughts on ‘Structure-based’ type of prototypes, and its respective tools.

Structure-based types

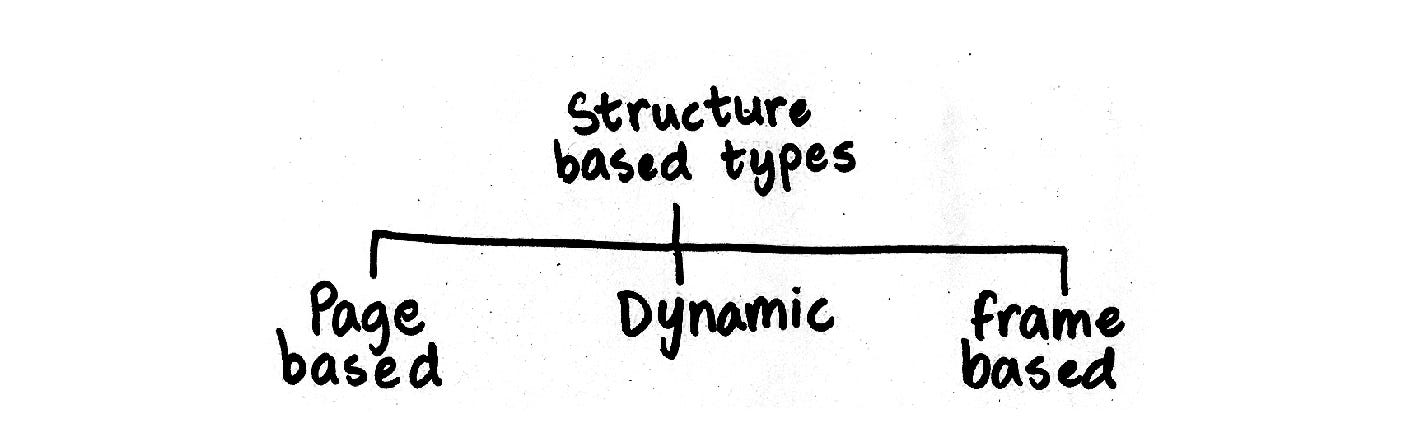
“Eh, what does that even mean? ”
Don’t worry, I have elaborated each type using the following

Structure of the article

1. What is it?
2. When to use?
3. How?
4. Architecture
5. Pros and Cons
6. Some tools
Followed by an overview of how to apply this learning in a real project.

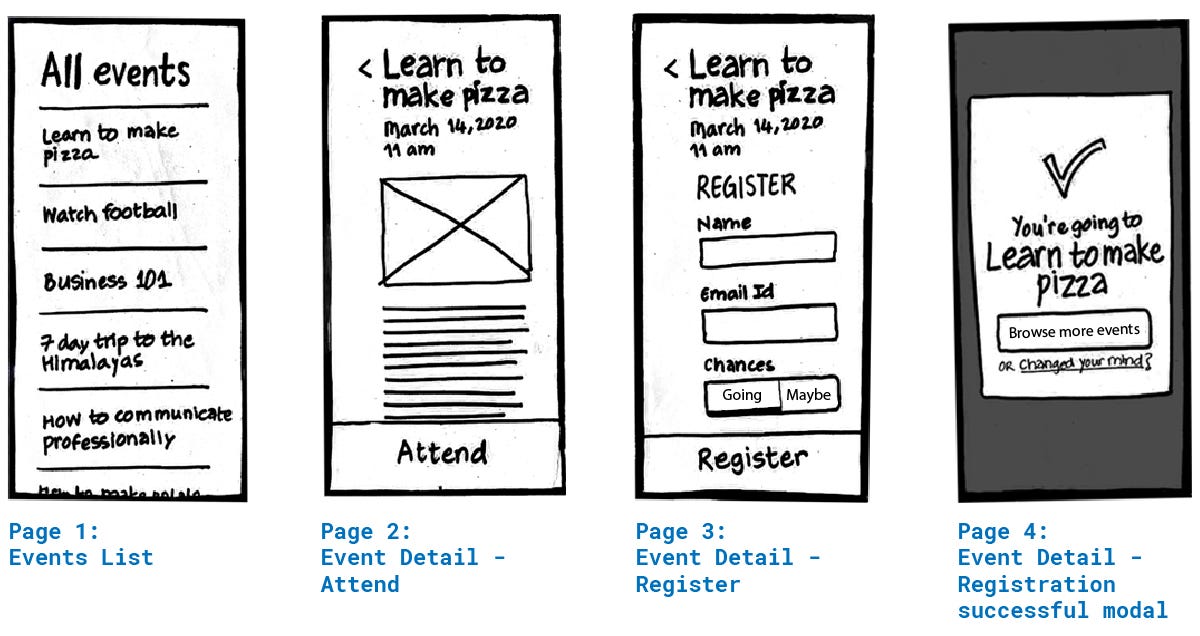
I have used an example of a hypothetical Events app which has:
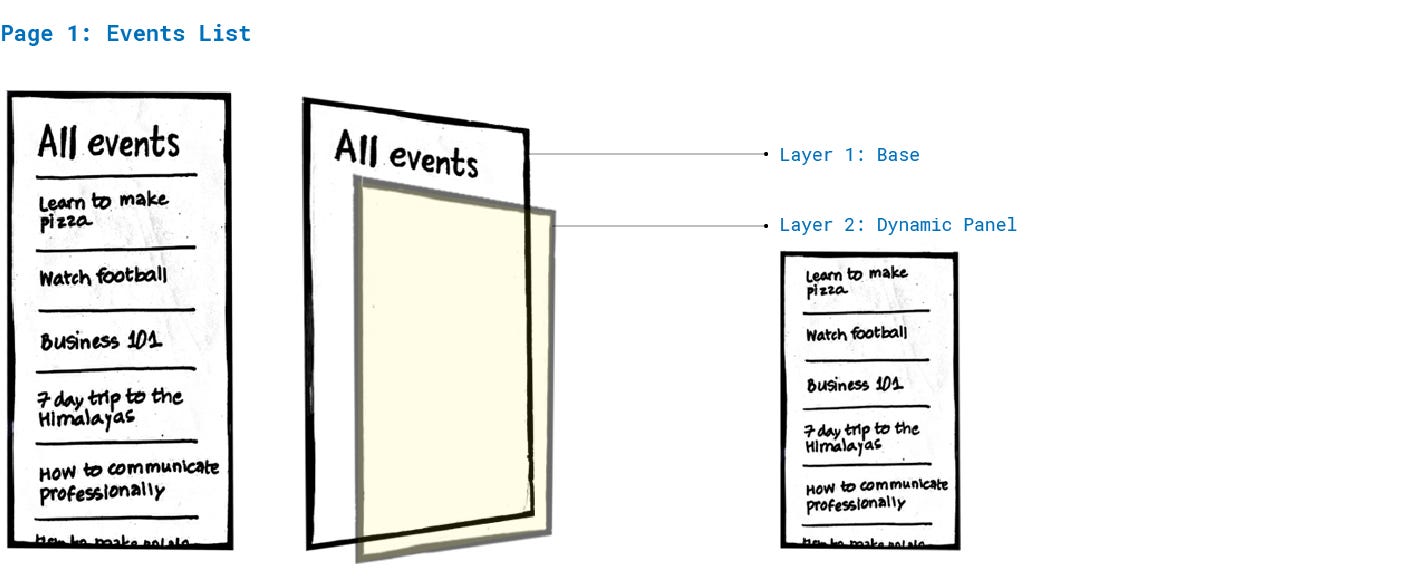
– Event listing page
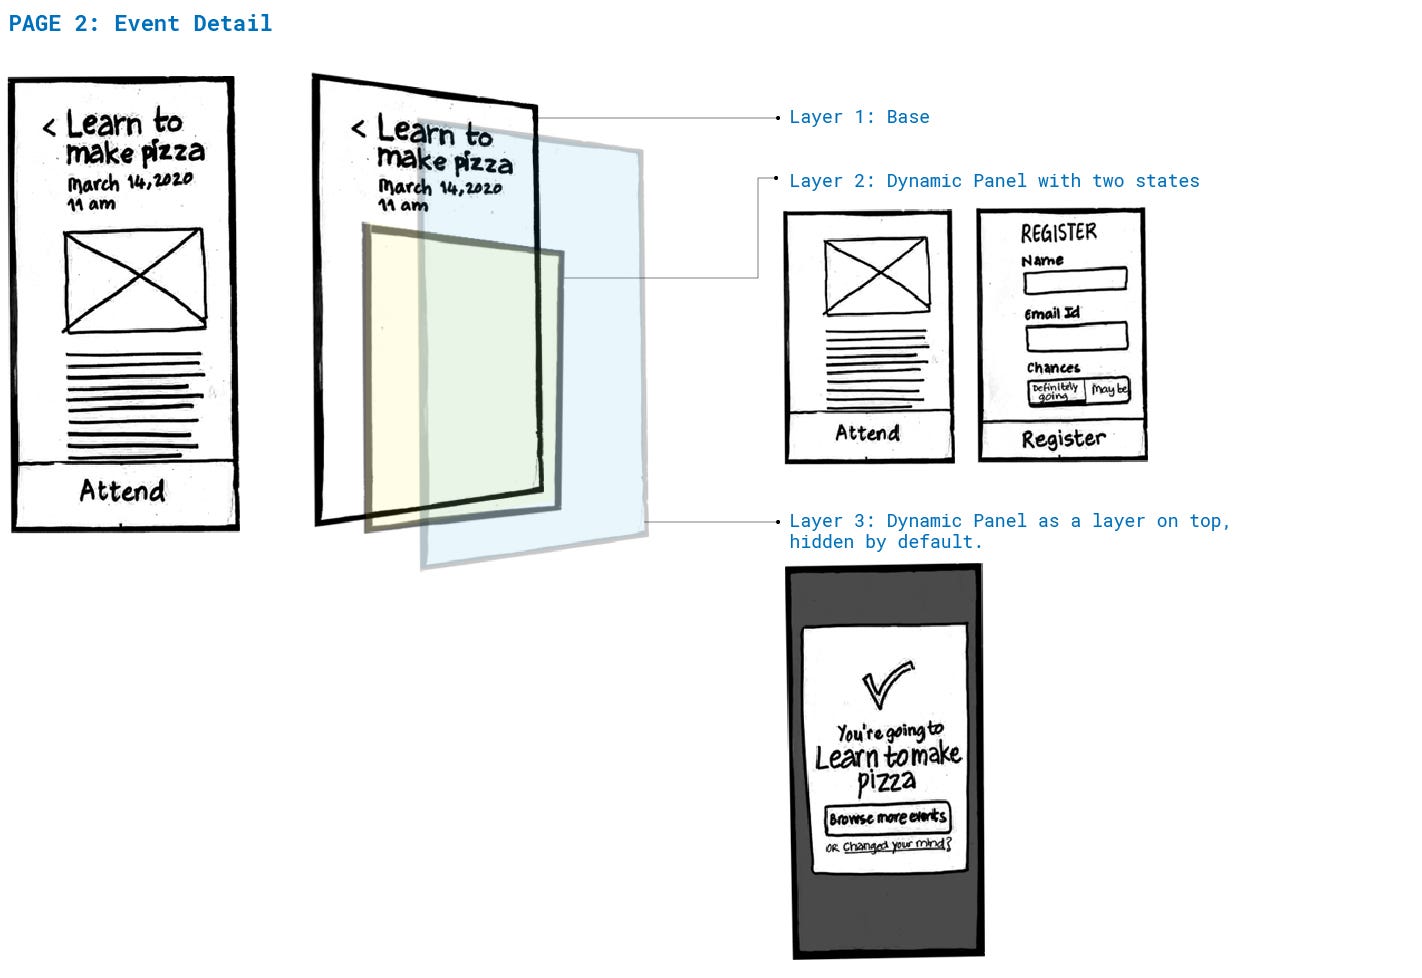
– Event detail page
– Registration successful modal

Let’s say this is a prototype that we want to achieve

prototype we want to achieve

[1] Page-Based Prototype

There is usually one page/screen/artboard for each interaction/step that you want to demonstrate.

When to use?

When there is one primary scenario to be demonstrated. And the interactions are not very complex.
This is usually used in B2C applications, which are relatively simpler.

How?

  1. Identify one scenario that you want to demonstrate
  2. List down all the steps required to achieve the goal of the scenario
  3. Make separate screens for the required interactions,
    i.e. One screen per interaction
  4. Prototype each step (usually in a linear fashion) to demonstrate the scenario

Architecture

Pros

  • Quick to make
  • Needs minimal analytical knowledge to prototype
  • Minimal learning curve for using the tool
  • Good for B2C web and mobile apps

Cons

  • In most cases, the prototype can be interacted with in a linear flow, hence restrictive flow while interacting.
  • Making it non-linearly interactive is possible, but time-consuming, as there are many pages that need to be given hotspots.
    Also, in that case, there are chances for the file to become heavy.
  • Since the components are repeated on each page, iterations can consume a lot of time.
  • If it is an online tool, it can only handle up to a medium-sized project.

Some Tools

Also read – The Importance of a Usability Review for Your Product


[2] Dynamic Prototype

There are usually dynamic panels and conditions to demonstrate the interactions. Its logic is close to the actual implementation.

When to use?

When the product is relatively complex.

How?

  1. Identify one or more scenario that you want to demonstrate
  2. List down all the pages required to achieve the goal of the scenario. (Pages here meaning how it works in the actual implementation)
  3. Identify the static vs dynamic components
  4. Make different states for the dynamic components
  5. Add interactions to the components. (Conditional interactions could be added as well)

Architecture

Architecture of page-based prototype
Architecture of dynamic prototype

Pros

  • Can handle prototypes with content coming from the database, real-looking objects, variables, sticky and scrollable panels, etc.
  • For in-built elements, rendering is done using HTML which brings it even closer to real. For eg. Input field
  • Behaviors are very close to actual
  • Good for demonstrating complex interactive web apps

Cons

  • A relatively bigger learning curve
  • Needs analytical knowledge

Some Tools

Also read – Scaling Lean UX: Expert Tips from a UX Designer


[3] Frame-based Prototype

Frames meaning the sequence of images that shows the motion — in a big picture, showcases transitions and interactions.

When to use?

Animation, beautiful micro-interactions and transitions.
When showcasing designs for delight.

Referring to the events example, a frame-based prototype can help demonstrate:

  • Transitions between screens (listing to detail)
  • Micro-interactions (on clicking the button ‘Attend’ or ‘Register’ or the ‘tick’ in the registration successful modal window, etc.)
Source: Dribbble, GIPHY

How?

  1. Identify the interaction that you want to demonstrate. It could transition between pages or components
  2. Make frames of the components to show transitions, using the readily available transitions in the tool, and using the timeline.

Pros

  • Efficient for micro-interactions
  • Easy to use, especially if plugin-based

Cons

  • Cannot handle 5+ pages efficiently

Some Tools


How to apply this in a real project?

Hypothetically, the real project is Events.co (Hypothetical real ?! ‍♀️)

Let us imagine this product has a web app as well as a mobile app. Here’s how we can plan the prototype:

Mobile App

The mobile app has all the basic essentials: a list of events, view details of events, users can register, add events to the calendar.
Users: Attendees, potential attendees
Recommended prototype: Page-based or Dynamic

Web App

The web app has more advanced features: all the features from mobile app + create and manage events, manage roles within an organization — who can host, who can manage, etc.
Users: Attendees, potential attendees, Hosts, Events managers
Recommended prototype: Dynamic

Design for delight

Designing transitions of components, animations or micro-interactions to add life to the product, that can be applied to both the mobile app and web app.
Recommended prototype: Frame-based


Hope this helps you select what type of prototype suits your need the best!

Also read – An Iterative Design Process: A Comprehensive Guide for UX Designers

author
Jui Pandya
I like when given a challenging environment. I believe design should be independent and it should talk for itself. I try to tell stories through designs. To me, a design is nothing but storytelling in a strategic manner, so that user's interest is best caught and harmonious experience is delivered. Every time when I think how we focus on making user's lives easy, it feeds the satisfaction of my existence as a designer.