API stands for Application Programming Interface.
API is a defined set of rules, which contains clearly defined methods of communication. API helps different software components to interact with each other.
API testing involves testing the collection of APIs and checking if they meet expectations for functionality, reliability, performance, and security and returns the correct response.
API testing is used to determine whether the output is well-structured and useful to another application or not, checks the response on basis of input (request) parameter, and checks how much time the API is taking to retrieve and authorise the data too.
Postman is an application for testing APIs, by sending request to the web server and getting the response back.
- It allows users to set up all the headers and cookies the API expects, and checks the response.
- Productivity can be increased using some of the Postman features, which are listed below.
A test in Postman is fundamentally a JavaScript code, which run after a request is sent and a response has been received from the server.
Installing Postman
You can download the Postman Native App from here or add the Postman extension from the Google Chrome Web Store.
POSTMAN is very easy to use. It provides collection of API calls, and one has to follow that collection of API calls for testing APIs of application.
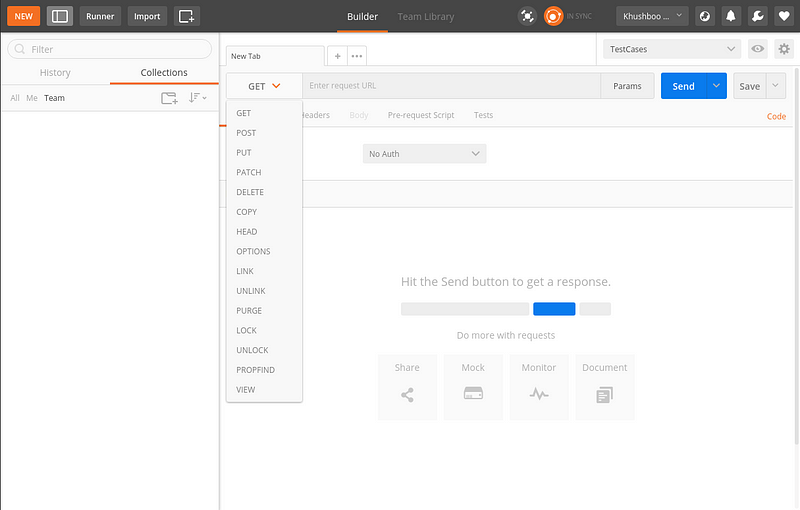
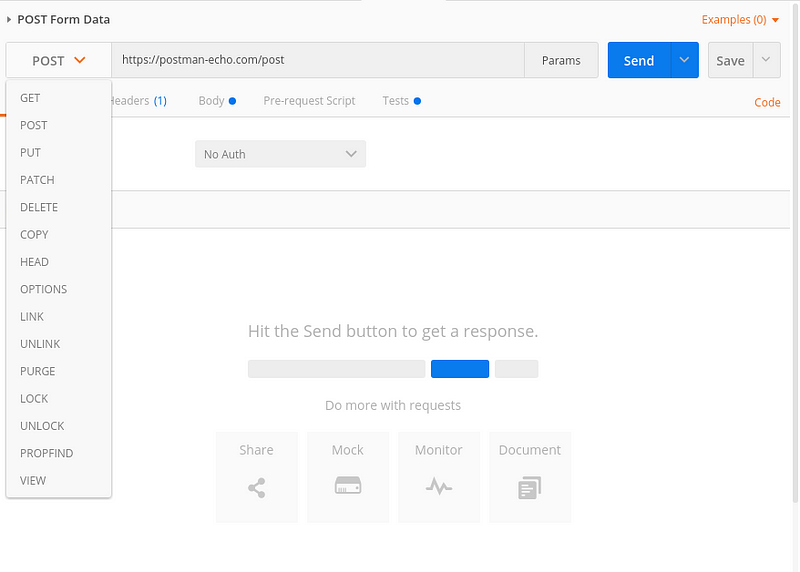
One can select API call method from the given dropdown list, set Authorisation, Header, Body information according to the API call.
API call methods available in Postman:
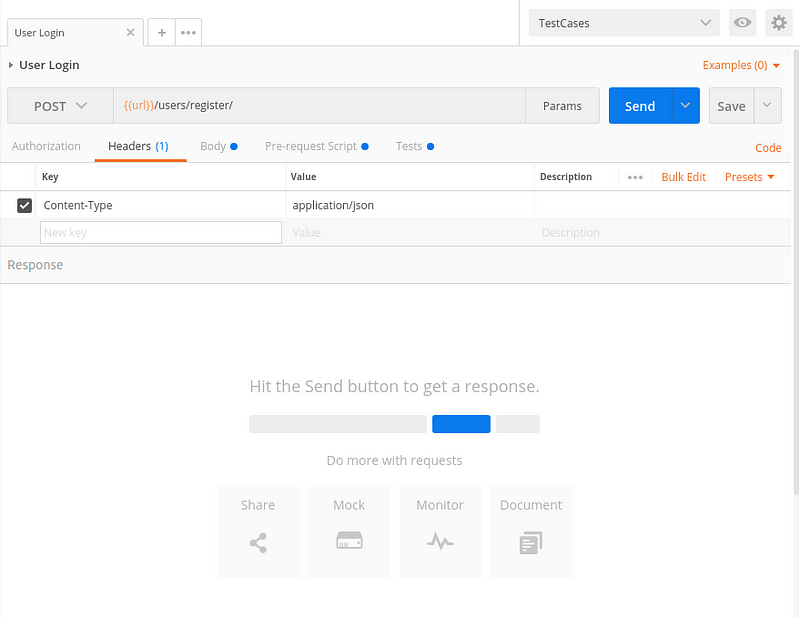
Header according to the API call:
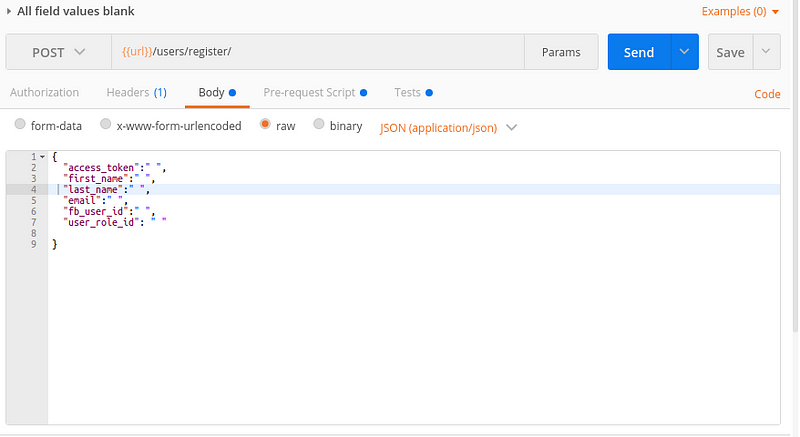
Body information according to the API call:
Then, one can perform the API call by clicking Send button.
Environment Variables in Postman
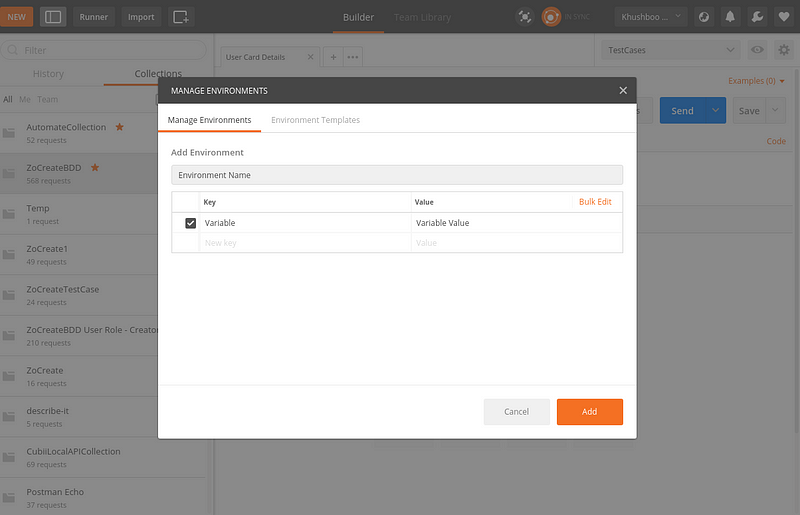
One can set the environments variable, from top-right corner, according to the requirement. One can easily set environment variable by following below steps:
- Click on Manage Environment from Settings (icon available at top right corner).
- Click on ADD button.
- Write down the Name of the Environment.
- Fill key & value, which can be used as variable in collection later.
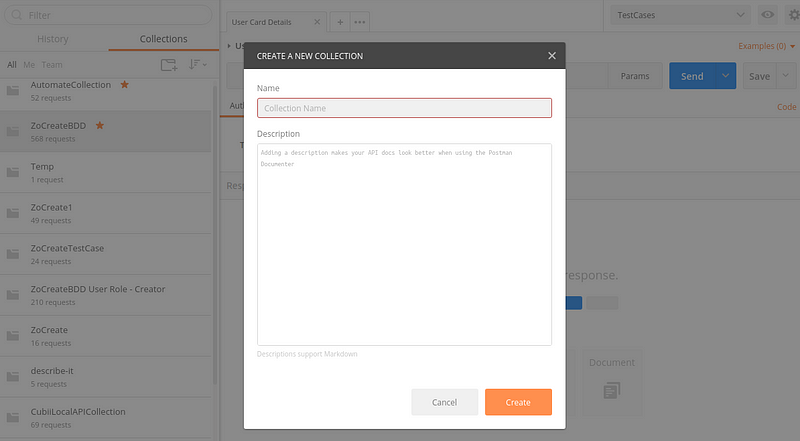
Add Collection:
One can add Each API call in collection and create a collection, that will be reusable for application.
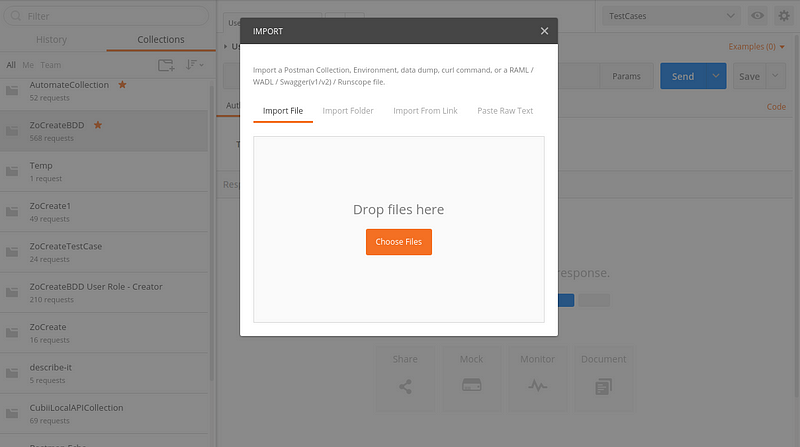
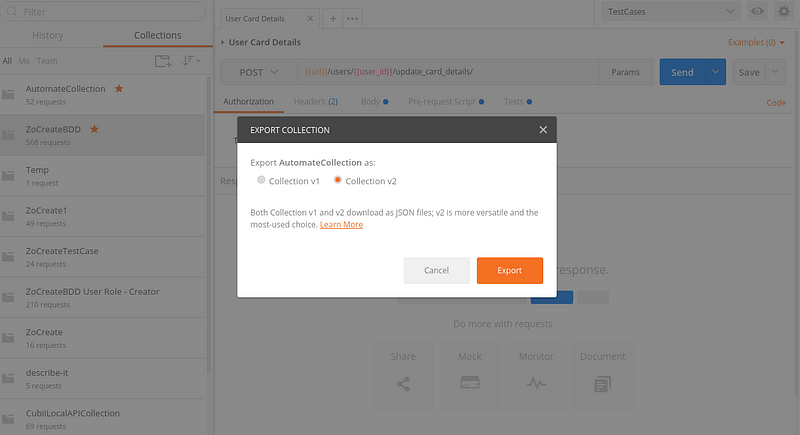
One can import collection of others and can export their collection, so that others can use it on their machine as well.
In API calls, I have mainly used two things:
1. HTTP Request
Request is the simplest way possible to make http calls.
HTTP Request contains of Request Method, Request URL, Request Headers, Request Body, Pre-request Script and Tests.
Request Methods
Request methods defines the type of request to be made.Request Methods available in Postman are as below:
I have used mainly four request methods frequently, which are as below:
- POST Request — For Creating Or Updating data,
- PUT Request — For Updating data,
- GET Request — For Retrieving/Fetching data and
- DELETE Request — For Deleting data.
Request URL
It is where to make the http request.
Request Headers
In request headers it contains key-value of the application. I have used mainly two key-value, which are as follows:
- Content-Type — A content-type describes the format of object data. Content-type, which I have used the most for the requests and responses is application/json.
- Authorization — An authorization token, included with requests, is used to identify the requester.
Request Body
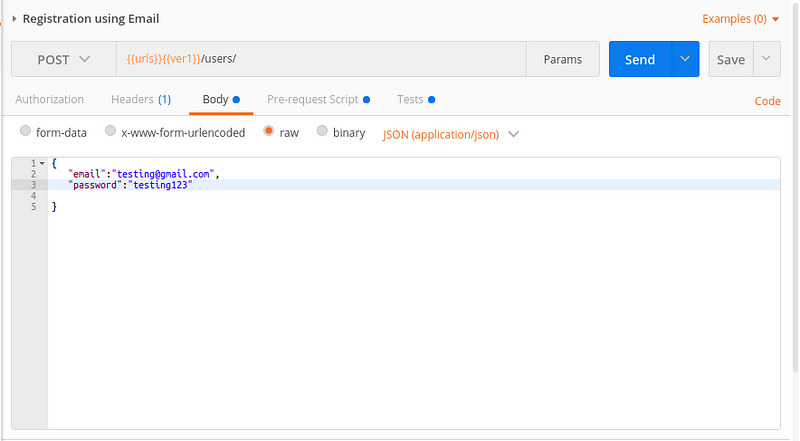
It contains the data, if any (depends on type of request method), to be sent with request. I have used raw form of data for sending request. Example is as below:
Pre-request Script
Pre-request scripts are piece of code that are executed before the request is sent.
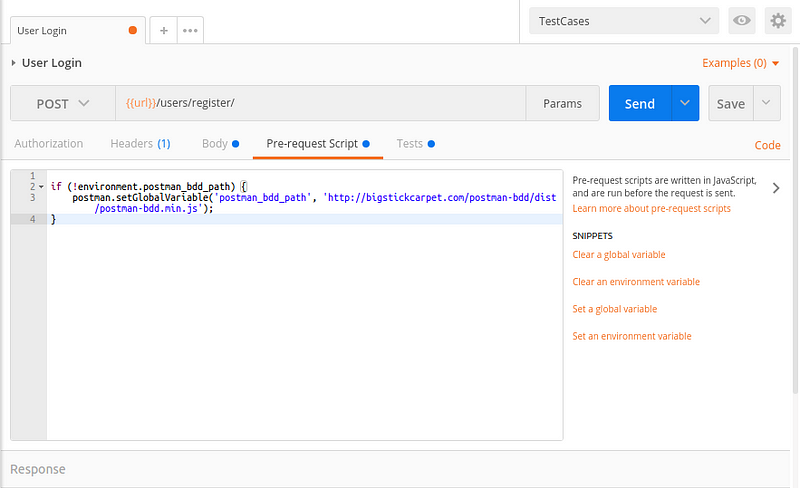
Example: In order to use Postman BDD (explained later in the article) with request, one needs to define the below code in Pre-request Script.
If the environment variable for “postman_bdd_path” is not set, then request, where pre-request script is defined, will use it from the request.
Also read: Cypress: Simplifying UI Automation Testing
Tests in Postman
In Postman one can write and run tests for each request using the JavaScript language. Below is the example:
Example of Test Description:
Example of Test Script:
Example of Test Result:
2. HTTP Response
On sending request, API sends the response which consists of the Body, Cookies, Headers, Tests, Status code, and API Response Time.
Postman organises body and headers in different tabs. The status code with the time taken to complete the API call is displayed in another tab.
There are many status code, from which we can verify the response.
Few of them are mentioned below:
- 200 — For Successful request.
- 201 — For successful request and data was created.
- 204 — For Empty Response.
- 400 — For Bad Request. The request could not be understood or was missing any required parameters.
- 401 — For Unauthorized access. Authentication failed or user does not have permissions for the requested operation.
- 403 — For Forbidden, Access denied.
- 404 — For data not found.
- 405 — For Method Not Allowed or Requested method is not supported.
- 500 — For Internal Server Error.
- 503 — For Service Unavailable.
Test Scripts in Postman
With Postman one can write and run tests for each request using the JavaScript language. Code added under the Tests tab will be executed after response is received.
As shown in above example,
tests[“Status code is 200”] = responseCode.code ===200;will check whether the response code received is 200.
You can have as many tests as you want for a request. Most tests are as simple and one liner JavaScript statements. Below are some more examples for the same.
Check if response body contains a string:
tests["Body matches string"] = responseBody.has("string_you_want_to_search");Check if response body is equal to a particular string:
tests["Body is correct"] = responseBody === "response_body_string";Check for a JSON value:
var data = JSON.parse(responseBody);
tests["Your test name"] = data.value === 100;
Check for Response time is less than 200ms:
tests["Response time is less than 200ms"] = responseTime < 200;Check for Successful POST request status code:
tests["Successful POST request"] = responseCode.code === 201 || responseCode.code === 202;Check for Response header content type:
tests[‘The Content-Type is JSON’] = postman.getResponseHeader(‘Content-Type’) === ‘application/json’;
Overview of Postman Behavior Driven Development (Postman BDD)
Postman BDD allows to use BDD syntax to structure tests and fluent Chai-JS syntax to write assertions. So the above test cases could look like as below:
Check for Response header content type:
it(‘should return JSON’, () => {
 response.should.be.json;
 response.should.have.header(‘Content-Type’, ‘application/json’);
 response.type.should.equal(‘application/json’);
});
Check for Status code is 200:
it(‘should be a 200 response’, () => {
 response.should.have.status(200);                                });
Check for Response time is less than 200ms:
it(‘should respond in a timely manner’, () => {
 response.time.should.be.below(200);
});
Check for Response body message should be ‘User logged in successfully.’:
it(‘message should contain’, () => {
response.body.message.should.equal(‘User logged in successfully.’) ;
});
Features & Benefits of Postman BDD
- Easy syntax
It has easy syntax which makes the tests easier to write and read. - Error Handling
If error in script occurs, only that one test fails, and other tests still run. Error gets displayed for the failed script. - Lots of Assertions
It gives full access to all Chai-JS and Chai-HTTP assertions and some custom assertions for API. Assertions made easier to remember and readable such as a custom assertion as response.body.should.be.a.user - JSON Schema Validation
User can validate responses again a specific JSON schema by using assertion as response.body.should.have.schema(someJsonSchema)
Also read: Dynamic Selection of Serializer Classes in Django Rest Framework (DRF) for ViewSet Actions
Postman BDD Installation
There are two simple steps to installing Postman BDD:
1. Download Postman BDD
Create a GET request in Postman with this URL
2. Install Postman BDD
User has to add the following code in the request created as above, in Tests tab:
postman.setGlobalVariable('postmanBDD', responseBody);
Then Postman BDD will be installed globally. One can use it in any Postman request by loading the script as below:
eval(globals.postmanBDD);
Conclusion
This is how I found Postman useful for API Testing and Postman BDD made my task much easier and faster.
Also read: A Guide to Test Case Management Tools


