In this blog i would like to share how i have configured CI with angular project which is generated using Angular CLI.
Angular is one of the most popular frameworks for building modern web applications. However, developing and maintaining a large-scale Angular project can be challenging without proper tools and practices. One of the best practices for ensuring the quality and reliability of your Angular code is to use continuous integration (CI). CI is a process of automating the building, testing, and deploying of your code whenever you make changes to it.
How I Set up Continuous Integration for Angular in Easy Steps
Below are the steps which i have followed to setup continuous integration.
1. Install Angular CLI
Before install Angular CLI we need to install nodejs in system.
Install Nodejs: https://nodejs.org/en/
Install Angular CLI and create project:
It will open browser and run the angular app on 4200 port. By Default port for angular project is 4200. You can change it by specifying with ng server command.
Now our angular project is ready. we have to install Jenkins for CI process.
2. Install Jenkins
Install Jenkins: https://jenkins.io/doc/pipeline/tour/getting-started/
If you haven’t install Jenkins in your system before than it will ask to create user account.By default Jenkins run on 8080 port.
3. Install PhantomJS
Angular CLI create angular project which runs test suites using karma which uses google browser to show test case results.
But for continuous integration we need some headless browser to run test suites in Jenkins.
So i’m using phantomjs to get the features of headless browser.We can use other one also.
Let’s install PhantomJS:
npm install — save-dev phantomjs-prebuilt karma-phantomjs-launcher
It will install karma-phantomjs-launcher in your angular project.
Now we have to configure PhantomJS. So we need to setup up some setting in karma.conf.js.
Below are changes you need to update in karma.conf.js file.
I have mentioned whatever changes i made in comments.
Also, we have to enable some polyfills which are needed by PhantomJS otherwise it won’t run the test suits.
Below are the files which we need to import in src/polyfills.ts.
Just replace your polyfills.ts file with the above code.
4.Let’s configure Jenkins to setup Continuous Integration:
Now it time to setup CI in Jenkins.
1.First create one git repository in your project and push it on Gitlab or Bitbucket Or Github and get the repository URL.
2. Now create freestyle project in Jenkins. Here i’m giving project name test you can give any name to it.
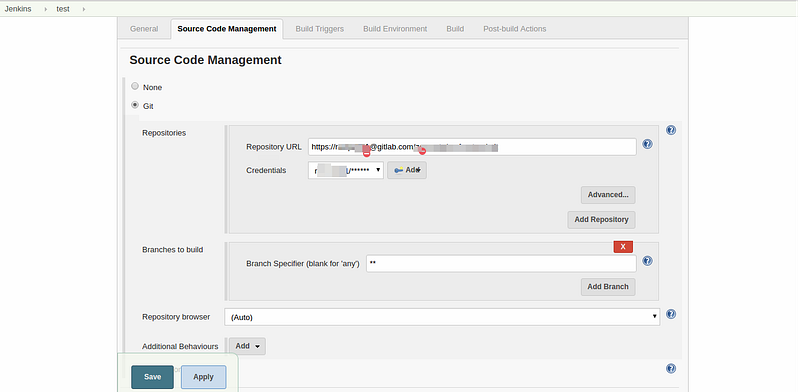
3. In Source Code Management setup the repository which you have created just before. So whenever you push any changes in your branch it will run the Jenkins task which you setup in Jenkins Build. Also you can set build trigger as per your requirement.

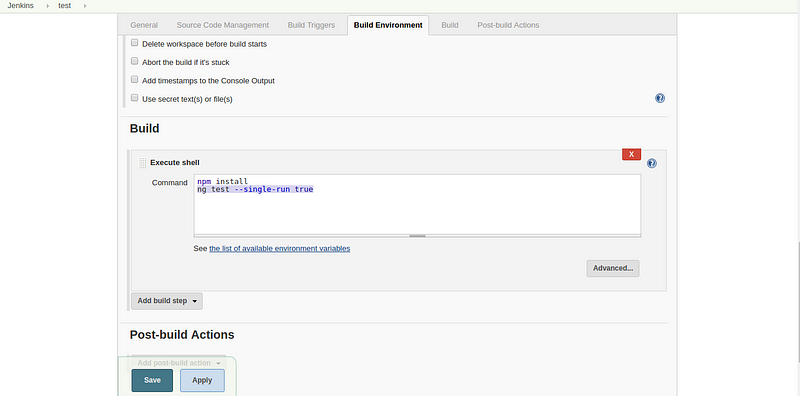
4. At last we just to run test suits using ng test: ng test — single-run true

Now continuous integration is setup.So whenever you push some changes in repository Jenkins run the test suits and give the result in Jenkins console.
We can setup Post build actions in Jenkins to notify the user about the test results.
That’s it about setup the continuous integration for angular project.
We hope this blog post has helped you understand how to set up a CI pipeline for your project using Angular CLI, Jenkins, and PhantomJS. If you need any help with your development or testing, feel free to contact us at Aubergine Solutions. We are a team of experienced and passionate Angular developers who can help you build amazing web applications.


